

In the last article I showed you how to setup a Azure DevOps pipeline to build your C# code hosted on Github. This time, I will show you how to automatically create GitHub releases with the same functionality.
So far your setup should automatically build for you everytime you commit to your GitHub repo. Automtically creating releases when committing code is rather straight forward as well as you’ll see.
Setting up Azure DevOps and GitHub
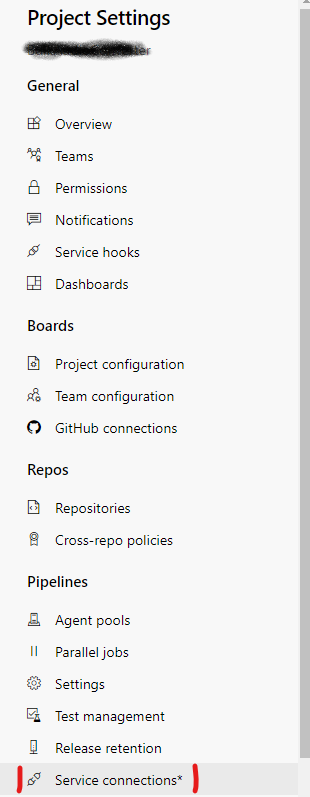
First of all, login to your DevOps account and navigate to the pipeline project we’ve build last time. Head to the project settings and find the „service connections“ option under pipelines:

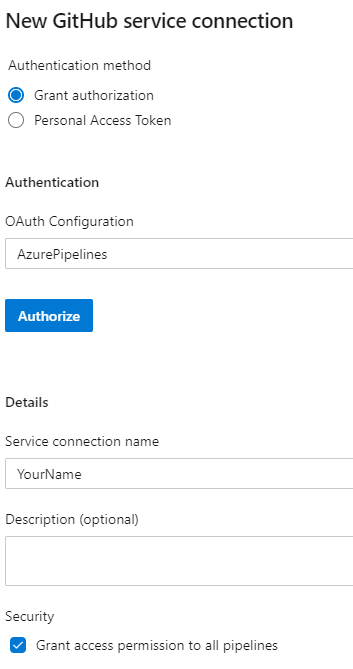
Create a new service connection of type „GitHub“. In the options you can choose which authentication method you want to use. From last time’s setup we already have a OAuth connection so I went for „Grant authorization“ and then chose the already existing „AzurePipelines“ entry in the dropdown.
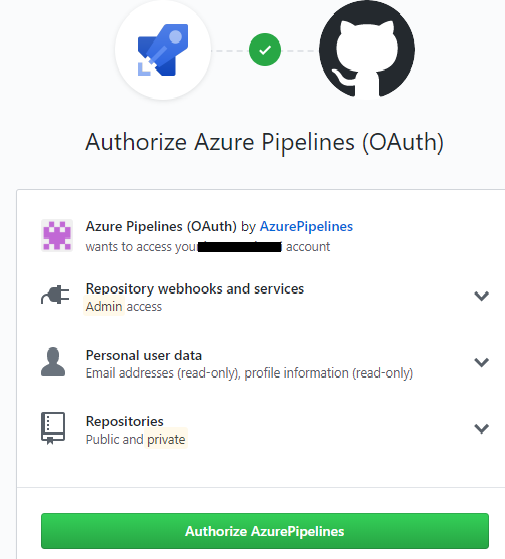
Once you hit“Authorize“ a popup from GitHub asks for permission:
Once the service connection is setup we can finally configure the behavior of the pipeline. Head to your pipeline configuration and add a new task/step. You can use the graphical editor or add it directly in the .yaml file.
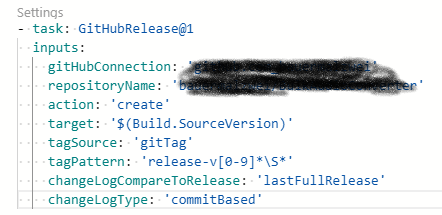
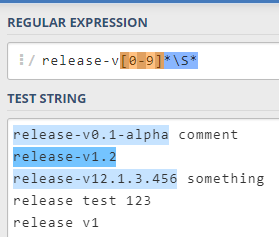
The settings are explained here. The important part here is the „tagPattern“. This is a regular expression that determines when a GitHub release is created automatically. In my case, only when the commit’s tag contains a very specific expression.
Basically, as soon as the tag associated with a commit reads something like „release-v0.1-alpha“ a GitHub release is created. In case you’re familiar with regular expression, check out the patterns that would match (generated with regex101.com):
And that’s it in regards to setting it up. Let’s check out how you use it.
Creating and using a git tag in Visual Studio
In C# country Visual Studio is probably the most common IDE – so here is a little how to on creating / setting tags in order to trigger the automatic release creation. For general information on tags, I found this to be helpful.
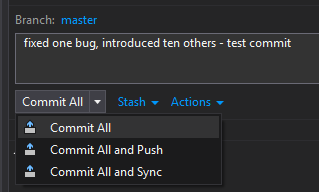
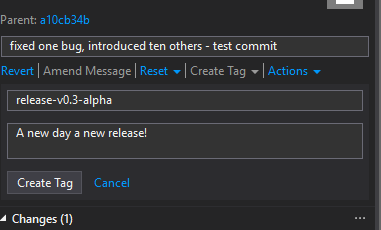
After a long day of fixing bugs / introducing future bugs you are commiting your work. Go ahead and type your commit message and then use „Commit all“ (we don’t want to push it yet):
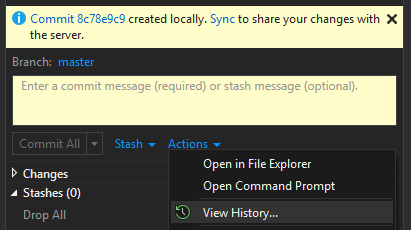
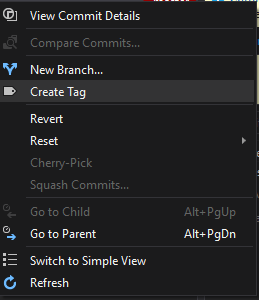
After commiting the change – use the „Actions -> View History“ option:
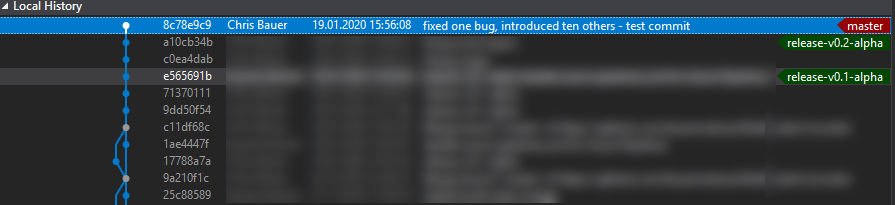
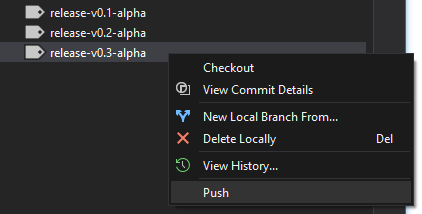
This will show you your local git history along with all tags and branches. As you can see, there are two release tags already. Now let’s create another tag to trigger a new release in GitHub.
Select the commit you just did – rightclick and choose „Create Tag“
Use the regex-matching release phrase and type a message and then hit „Create tag“. This will create the tag locally and associate the commit with it.
This is instantly reflected on the history (refresh it):

If you push your work now – no GitHub release will be created.
But why? The reason is that you just create the tag locally, so it is not yet available on GitHub, thus the build process on Azure will tell you that no tag was found matching your pattern (The build pipeline will report „Release will not be created as the tags for the target commit do not match with the given tag pattern“).
To avoid that you have to push the tag before pushing the commit. Navigate to the Team Explorer in Visual Studio and hit „Tags“. Rightclick on the newly created tag and push it:
After that you can savely commit your work and Azure DevOps will instantly create your GitHub release for you.
Warning/Note: While you can easily create new tags from within Visual Studio I have not found a way of assigning existing tags to a commit via the IDE. This is kind of by design as far as I understand the notion of git and tags. So in order to make this all work, you have to follow this procedure rigorously (change -> commit -> create tag for commit + push tag -> push commit).
Conclusion
If you judge the solution by the raw length of these 2 articles it may seem complex or clunky, but if you have set it up once, it really becomes easy. I find myself using this on all my repositories. The only downside I see is that I tend to forget pushing the tags – thus not creating releases. However it happens rarely and then you can still fix it via the git commandline – if needed.
